Showing posts with label cleaning. Show all posts

Saturday, January 4, 2014

UPDATE: Decluttering & Kids - Artwork

*Minimalist Reading - NO time to read this long post? Just read the bold parts and you'll get the summary version! You're welcome!

I previously posted about decluttering, kids and artwork. If you haven't read that post, you could take a look at it HERE. I'm not going to recap everything I covered but I am going to update a bit and maybe streamline the whole process in a more condensed form of 'instructions' on how to make this work for you.

Why an Update?

It's just past the holiday season for us - that means Thanksgiving, Christmas, and the New Year just wrapped up. Now the 5 and 6 year old are ....drum roll.... 6 and 7 years old! (Life is good!) but the art work has increased, not slowed down.

The girls have spent a solid 2 weeks off of school and now they are heading back (As in, this coming Monday!) so what should we do with our weekend but tackle 'The Beast' aka the Art Wall.

Previously, when I talked about managing the art work mess (because, really, that is what it is) I said that I was updating our scrapbook every week. Well...that fell flat quickly! Nobody has time for that!

I've settled for updating only during the girls' school breaks (or when the art wall gets CRAZY! but trust me...we just pile that art work on there if we can! One on top of another, over another, over another!)

I'm going to walk you through the actual step-by-step of what a ONE day digital scrapbook marathon looks like for me.

How often should you do this: Once or Twice a Year

Tools you will Need:

  • A Mixbook account (FREE) - Referral link ~ Thank you!
  • A Dropbox account (FREE) - Referral link ~ Thank you!
  • A Phone with the Dropbox app or a Camera with the ability to download your photos to your computer
  • A mountain of artwork that needs to be organized
  • If you are using your phone to upload your photos, make sure you are able to use WiFi to upload them or that you won't mess up your phone data plan by uploading a gazillion photos. Wifi = good.


Simplest Steps:

1) In your Free Dropbox account, set up the following file structure

Create a folder called 'Scrapbook' or 'Mixbook'
Inside that folder - Create the folder '2013' (or whatever year the photos were taken)
Inside the folder 2013: Create two folders 'Family' and 'Art'
Inside the folder 'Art': create one folder for each child. Only have one? Skip this step.
Do this for each year.

* Set up your phone to automatically upload your photos to Dropbox whenever it has access to your home/free Wifi. (Otherwise, you can easily go over your data limit)

2) Take photos of ALL the artwork that your child/ren brings home. I do this two or three times a year, not every week as I had said before. Weekly is just too much work.

3) Go through ALL photos after they have been uploaded to Dropbox and delete any that are blurry, out of focus, people are blinking, unflattering, or otherwise not something you would want in your scrapbook. Art work, you just make sure you don't have duplicates.

4) Delete ALL photos off of your phone/camera that you have uploaded to Dropbox.

5) When you have uploaded all of the family/art photos you are going to for the year, your folders are done/full!

6) Upload all the Family photos for the year into one mixbook (labeled correctly) and press 'Mix it' or lay it out manually in the way you want your scrapbook to look. Press save.

7) Upload all the Art photos for each child into separate mixbooks (labeled correctly) and press 'Mix it' or lay it out manually in the way you want your scrapbook to look. Press save.

You are done scrapbooking an entire year's worth of art/family photos in a matter of a few hours.

This is my process for scrapbooking. It's lazy, easy, and saves me a lot of time. I just 'mix' the artwork for the girls and don't bother laying them out. I *DO* put a photo of the girl on the cover of her art book, but that's it for customization.

Do you Print or do you Email?

Personally, I email links to family and friends. It has always been my intention to send these out as Christmas gifts but I never get around to it - because I'm lazy. One of these days, I might get around to it. But I think most people in our family prefer digital.

That's it! I've actually spent more time on this blog post than on doing the scrapbooks today. (I'm waiting patently as all 800 photos upload....*rolling beach ball* so...yeah. I hope this was helpful in tackling your artwork mess! Remember - Work Smarter, Digitally, not Harder!


Sunday, June 23, 2013

Cleaning - Fish, You're doing it Wrong


First, I would like to say that I never wanted fish. And I fully expected them to die quickly. However, after we picked out fish I discovered these little guys (betas) are going to live up to around 7 years! WHY?!

Why indeed. We got the fish to teach the 5 year old and the 6 year old responsibility. They have to take care of the fish in order to 'upgrade' to other types of pets. Gerbils are next on the list. Daddy is going to be cleaning it - because Mommy has been cleaning up after the fish since day 1! Anywho - that is the point - too much cleaning!

Anyone that has a fish will tell you fish are easy to keep. They are lying in hopes that you will suffer through water changes as they have. The betta fish require especially require a great deal of water changes the smaller the bowl. And then as you research you find that you are a horrible person if your fish is in a bowl smaller than 2.5 gallons. This is where you feel guilty until you upgrade.

Things are complicated when you have more than one child - it is a rule of the universe that they will want the fish that cannot be placed in the same tank. Let us look at Betta fish math: Male+Male=Dead fish. Male+Female=Dead fish. Female+Female=Dead fish. Female+Female+Female=Your only one tank solution. Well. That sucks. Moving on!

In order to get a larger tank that would keep both fish happy and keep them in the same tank without them dying (We have one male and one female, I wouldn't recommend this with two males since they would stress each other out until one dies) I got a divider and split the new 10 gallon tank. I probably should have split it LONG ways but...I wasn't thinking at the time. Should have, could have, would have. Now I'm glad I didn't. Because it means a better way to deal with water changes.

Before the bigger tank, I was doing a water change every other day (All the water) for both fish bowls (1 gallon). The fish were boring and didn't have much room to swim. Enter guilty feeling mommy. After about two months of this - I was really sick of water changes. I upgraded to the 10 gallon tank. Now, I do a 10% water change...um, every day or every other day. "This is getting old fast" I have been saying for about 4 months.

I have looked into a lot of stuff - all things that complicated things and cost even more in maintenance, equipment we didn't plan to need for 7 years and lots of science. I'm a smart mommy - but I don't want to get all sciency up in my fish tank that I hate cleaning. I needed something EASY that required little or NO cleaning. Enter "the clams". 

I got clams for the tank, fresh water. It was really strange ordering 'live clams' on ebay but whatever. They got here - the female fish ATTACKED one and killed it about thirty seconds after I put it in the tank. We figure the female has some suppressed aggression issues she's struggling with. I think she needs help. But for now, I moved all the clams into the male side of the tank. His approach is "Whatever" and leaves them alone.

This has increased the 'bioload' of the tank which means I'm still doing daily water changes. Bioload - the simply explanation, is a bunch of animal waste in the water. Fun. The water on the male side of the tank is very clear. The clams are really doing their part! But for whatever reason, it's not helping the female side of the tank (Probably the divider) and there are still large particles caught in the rocks on the bottom of the tank. The problem? The clams need a current and I don't have a 'current' in the tank and I hadn't really planned on giving them one. When I add water to the tank, I do it on the male side to kick the water up and give them a daily current so they get food floating by them. So far it is workin g a bit. But not was well as I wished it was.

Now - what is a Minimalist Martha like myself to do?! I have all these water changes I'm doing, still siphoning water out of the tank almost daily and I have to haul a bucket of (slightly appreciated) nutrients out to my balcony garden. Personally, the garden doesn't *need* it and I don't need to carry buckets of water like this is the 1800's. I'm not wearing a prairie dress here, am I? I didn't think so.

I have been researching aquaponics for a few months. My over all opinion is the following:
Pros:
  • No more water changes - OH MY GOODNESS WE HAVE A WINNER
  • It takes care of itself - YES!
  • No need to water the plants - This is AMAZING!
Cons:
  • The set ups are ugly - Oh. That sucks.
  • It's not really designed for a livingroom side table - Double bummer.
  • The set ups are notoriously expensive - Not cool, man.
  • They require a bit of engineering - Hmmm...I have some brain power.
  • They are a more substantial investment then just getting the filtering system for the fish tank and maintaining that. - Extra not cool. More money, different science, same maintenance almost.
Then you go the DIY route and the aesthetics gets REALLY unsightly. I did find this cute little number and I *WANTED* it, almost ordered it but the thing is - we would need TWO. That means roughly $120 for two. Hmm....not cool. 


We're back at the same investment as just getting the tank filtration system and cutting the betta's water down a bit. That would bring back the 'small tank guilt syndrome'. 

But while watching the video they provide, I saw what essentially made it work - a tube leading up is pretty obvious but the part that is difficult is the container on top. How do I suspend the plants above the tank without a really ugly look. It doesn't have to look space-age, but I don't want a wooden structure build on top of my fish tank in the livingroom. During some of the footage, for about 5 seconds, you see someone place a board on the top of the tank with holes cut into it. It is just barely bigger than the tank and that's how it stays up. Lightbulb moment for anyone else?

I had some foam board I save for random projects - well, this seemed worthy. I got the DIY bug and started looking at how I could grow stuff with this information. 

Then I came up with the following in about 20 minutes:

That is a piece of foam board ($1 at the dollar store - I love making stuff with foam board) cut slightly larger than the top of the tank and with a place cut out for a 'disposable' strawberry container. I plan on cutting the lid off incase you were wondering! I also wanted to make a shell that comes down about 3 inches all around the tank out of foam to sort of hide the hanging strawberry baskets. I'm not sure if I want to put that much effort in just yet. 

Now I still need a pump (being ordered) and some tubing for the pump, and a 'tee' split for the hose so it can water both strawberry containers - but in general, I hope that the finished project really will result in ZERO water changes ever again and lettuce/spices growing out of the top. Hello! I can get behind that!

Lastly - I still have to cut a hole in both sides of the little white 'frame' to feed the fish. Not a big deal!

My roughest estimate is that the pump, the air/water hose, the tee split and maybe some little clay bead things to place in the containers will run about $40. Not bad. No maintenance beyond feeding the fish. If I decide I don't want the pump on all the time, I can set it on a timer to run for 15 minutes on the hour.

So far - Minimalist Martha is planning on crossing "Clean Fish Tank" off the list of things to do - Forever!

I hope that this has sparked an idea or at least given you a warning about the illusion of 'easy to care for fish'!  My suggestion? If you really are going to get a tank - start with this optional DIY add on and save yourself the daily chores that goes along with fish!

Get Smart - Get Lazy - Take back some Mommy time by getting rid of or simplifying one chore at a time!


Thursday, June 20, 2013

Cleaning - Schedule Schmedule

I don't always stick to my cleaning schedule. And as far as schedules go - I've had half a dozen or more. My usual task list is usually a micromanaged list of every single thing I need to do - but cleaning sucks. I would rather spend my energies doing other things -anything other than cleaning. Sound like you?

I don't have a magic wand - but I do have a schedule that I have finally gotten to work for *me*. I hope that it will work for you but don't feel like you have 'failed' if it doesn't work for you - you just haven't found the *right one* yet!

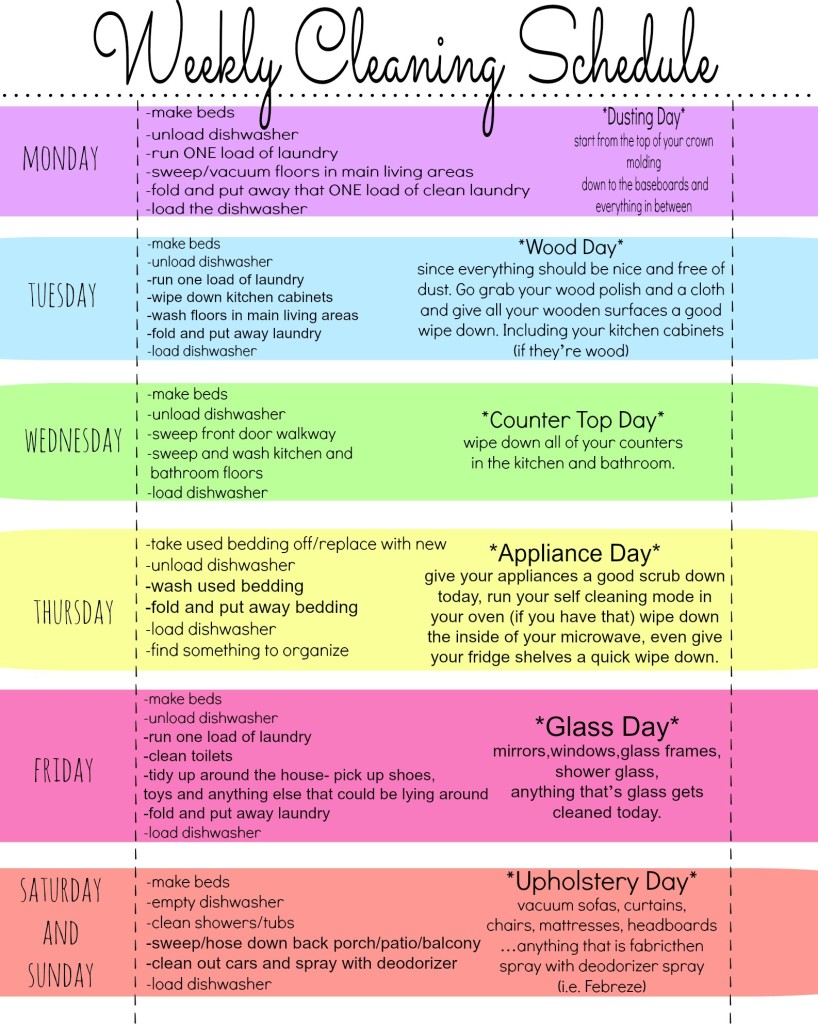
For me - this is the right one - finally! But sometimes, I still just don't clean anything. It's not your fault, Schedule, sometimes I'm just not in the mood despite your awesome color scheme. Want the Schedule? Download by following the link below the picture or follow the link of the photo/schedule!


Why I love this schedule - because it breaks up my cleaning into roughly one or two things a day that are fairly easy given my decluttered lifestyle. If there was clutter - yes this would be harder. Have clutter trouble? Check out the decluttering section!

Where did I find this schedule? Because I didn't make it! I found it on Pinterest. Then again, I found the other half-dozen there too.

Oh - right - back to *Why* I love this schedule!

At the very basic - all this schedule is saying is the following:


  • Monday: Dust your house from top to bottom. 
  • Tuesday: Wood! - Anything that needs wood polish gets a good shine (Yay! Jokes on you schedule! NO wood!)
  • Wednesday - *Counter Top Day!* Wipe off all counters in the kitchen and bathroom!
  • Thursday - Appliance Day! Run self clean mode on oven, wipe down the inside of the microwave and do a quick wipe down the shelves in the fridge.(I don't always do the fridge - extra lazy Thursdays!)
  • Friday - Glass Day - mirrors, windows, glass frames, shower glass (I have none), anything that's glass.
  • Saturday and Sunday - Upholstery Day - vacuum sofas, curtains, chairs, anything fabric and spray with Febreze. 


Now - this *Looks* like a lot but that is because of all the detail. If you delete all the detail wording it is less scary. Give it a look now...

  • Monday: Dusting ALL of the Things!
  • Tuesday: Wood Polish ALL of the Things!
  • Wednesday - *Counter Top Day*
  • Thursday - Appliances Day
  • Friday - Glass Day
  • Saturday and Sunday - Upholstery - Febreze ALL of the Things!


Why is it that this schedule works for me where others have failed?
I have a theory but it is just a theory. When I actually manage to get *motivated* to clean stuff it usually fades after about 30 minutes. So I'm good for about 30 minutes before I become depressed from cleaning.

What seems to work is that I only have to find ONE thing to clean with, be it a duster, wood polish, appliance cleaner, a wash rag for each counter, or the windex and a squeegee, or Febreze! Now if I had to find ALL of that stuff on one day and clean ALL of the Things for ALL of the day - I would strike. I mean I would actually strike stuff, like a ninja! (Kidding!) But in seriousness, if I only have to find one thing to clean with and just do that one thing - I'm usually pretty good. Honestly, today I did the appliances on the right day on accident - just because I wanted to clean the microwave.

Oh - and I still have some tips and tricks for cleaning things! Microwaves? Easy cheesy! Check out the post on microwaves and make the Microwave clean itself (almost).

When it comes to cleaning, you really need to figure out how you *like* to clean before you try to force yourself to clean on a schedule. And I really recommend decluttering!

I keep my weekly cleaning schedule in my 'household binder' (which I started this week - cleared out all my coupons *gasp*). But you can just stick that one weekly schedule on your fridge - the side even - and just look once a day. If you cut your cleaning time down to 15 minutes a day you won't stress over cleaning and you'll have loads more time for other things.

As with all things in life, it is easier said than done. I hope that this has motivated you in some small way. If this schedule doesn't work for you - I hope it has encouraged you to find a method that works for you and helps you keep a tidy house on your own terms and your own time. Saving more time for YOU and sacrificing less time to the cleaning of the dreaded MESS!


Cleaning - Microwave Monster

The microwave used to be a beast, a monster, a nemesis. I used to wear my cleaning agents on my hip and shoot from across the kitchen with one eye closed and praying for the best. Just kidding! But I dislike all cleaning so why would I suddenly enjoy cleaning the microwave? Well - easy is pretty pleasing to me.

I don't mind cleaning the microwave ever since I figured out how to soften up all that stupid microwaved on food without giving myself a sprained elbow or wrist from scrubbing (I'm short, that angle also is unpleasant).

I found on the delightfully pinteresting Pinterest of course a fascinating way to clean your microwave faster and easier. I didn't pin it and now there are a lot of posts on Pinterest with this idea so you might have already read it but I'm going to cover it anyway because it is an easy way to clean.

A word of caution: I have heard that some people have had the water explode on them. Please use caution and if you microwave for 5 minutes, be sure to wait one minute for the steam to really work on the inside of the microwave before you open the door. Don't wait *too* long or everything will 'harden up' again. Kind of a pain. I use a thick ceramic bowl but I use closer to 2 cups of water and I sometimes microwave for upwards of 10 minutes depending on how dirty the microwave is. Again - caution, Hot! It might explode!

Remember that every microwave is a little bit different - be careful!


How I clean:

A bowl or cup (needs to be microwave safe for up to 10 minutes!)
1 cup of vinegar
2 cups of water

Other variations:

Just Water

or

Water and sliced/juiced lemons

Now, if you are like me you will try this out at least once. It works for me, even when it is a really messy disaster which is when we need it most, right? I was surprised to read about people blowing water up in their microwave so seriously, be careful please?

I hope that this has helped you a bit with messy microwaves and helped tame the beast that was!

Remember - don't put so much effort into cleaning! Work smarter - Not harder!


Thursday, June 13, 2013

Kids & Cleaning - The Chore Flowers

We decided it was time for the girls to have chores. But we didn't want to start them on an allowance because we believe every person in the family needs to contribute to the family. These are called 'responsibilities'. But we still wanted to reward the girls if they go above and beyond.

What Problems Were We Facing?

  • I didn't want another chart on the wall
  • We were having problems with the girls picking their toys up
  • It needed to add to our decor, not clutter up the house
  • I needed the chore list/chart to be adaptable - adding and taking away chores
  • I needed to incorporate an Uh Oh box but again - no random slips of papers
  • I needed to add an incentive/reward type system that wasn't going to clutter the house up
These were many things to consider and I spent about two weeks looking online for a solution. I found many individual solutions but not really anything that would work together. I needed to minimize all the pieces and 'moving parts' that would lead to essentially more clutter and confusion.

I took several concepts and put them together or changed them.
First was the Uh-Oh box. This is something very cute that I found on Pinterest but I didn't like the slips of papers (could be lost, have to print them, would float around the house). 

Next, I wanted a Chore Chart. I found many clever ideas but nothing suitable. They all involved charts, lists, clipboards and such. But I didn't want more lists and charts. This stumped me. I came up with something all my own for this solution.

Last, but not least, I needed a reward system. Again, we didn't want to give an allowance. We wanted them to feel as though they are working toward something. I adapted the Uh-Oh box and mixed in a ticket punching system. 

All three of these things were incorporated into our Chore Chart solution which I ultimately came up with on a whim. They are "Chore Flowers". 

Why Chore Flowers?
  • I can tell what each flower is for - small purple filler flowers are uh-oh box chores, Big red glittery roses are Reward Box chores, Pink tulips were chosen by the 6 year old so those are all her daily chores and the red tulips were chosen by the 5 year old so those are all her daily chores.
  • These are placed in three vases. One vase per child and one vase for mommy (it holds the red roses and filler uh-oh flowers). 
  • These decorate the house while secretly holding chores. How? The bottom of the flowers are hotglued to Popsicle sticks. Each Popsicle stick has a chore written on it.
  • Anyone visiting just thinks the flowers are pretty, they don't realize they are chores!
  • This means getting rid of a chore chart, a reward chart, uh-oh box pieces of paper and adds a splash of color to the apartment which was much needed.

Reward and Uh-oh Chore flowers - Mommy's vase!

How I chose the chores:

Uh oh chores - these were chores that are not fun, slightly tedious, but don't take more than about 15 minutes. Examples: wiping down the walls downstairs, cleaning baseboards, cleaning and organizing the end tables in the living room, etc.

Reward Box chores - these were chores that make mommy's life a little easier. It is something I wish I didn't really have to do - like cleaning the toilet (I have a way to make this fun for kids!) or sweeping and mopping the kitchen (we use a kid-friendly Swiffer). There is another step to this though - each chore gets a hole punch in their ticket. (Getting to that)

Daily Chores - these are things that we ask the girls to do a lot. It all comes down to age. The basics are - shoes put away, books put away neatly, backpack put away, bed made, feed your fish, toys put away,  bathroom sink cleaned, laundry picked up and put away, reading one book a day, and they each have to do 15 minutes on ABCmouse.com which they love. So if you find yourself reminding your children to do something every day, make it a flower!

How this ties into the Uh-Oh box and the Reward box.

The Uh Oh Box - if Mom finds something out that should have been picked up, then it goes in the uh oh box. It is very simple - the girls do one purple flower chore (an uh oh chore) and they get one thing out of the uh-oh box. It's a 1 flower for 1 item exchange. Very simple. If Friday rolls around, the girls have to do enough uh-oh chores to get ALL the things out of the uh-oh box before their weekend begins. NO uh-oh chores can be done until ALL their daily chores have been completed. It's a rule.

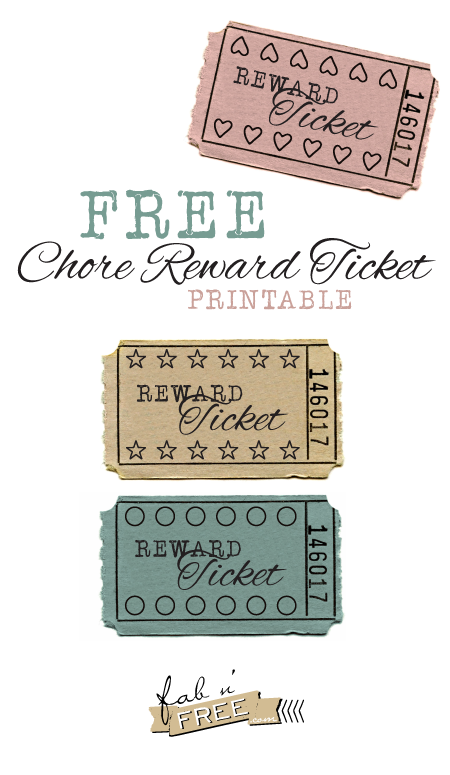
The Reward Box - for each red rose done, the girls get a hole punch in their Reward ticket. (They know where the reward tickets are kept so they can get a new one whenever it tickles them). The reward ticket has 12 places for punches (it's a lot but the prizes are pretty cool). After they get the ticket punched all the way (12 chores) they get to pick whatever they want out of the reward bucket. This is how the girls' earned their beta fish. Same rules apply - all daily chores must be done before any reward chores can be done.

What do we use for an Uh-oh Box and a Reward tub?
Target had plastic treasure chest tubs for $10-$20 and we got a red one which was perfect for our Reward tub. We use a CLEAR tub (very important so they can see what is inside without opening it) for our Uh-Oh tub and it has the standard little Uh-Oh rhyme on top.

What do we use for reward tickets? 
There is a great free printable that I found online that is perfect. Just print it off (color looks better! but black and white works) and if you don't have a hole punch and are going to get a new one anyway I suggest getting a FUN hole punch. I got one that punches little tiny hearts instead of circles. The girls love it!


Special thanks to Fabn'Free: Free Printable Chore  Reward Tickets


Where did I get the flowers? 
The dollar store. I let the girls pick out the flowers they wanted (I didn't tell them they were for chores) and once they picked ONE flower I got at least 12 of the exact same flower (about 3 bunches) for each girl. I spent about $20 on bunches of flowers and used a wire cutter to separate them into individual flowers. I used two popsicle sticks glued together to give height. Also - I got two plastic vases from the dollar store (matching) for the girls because they like to pick their vases up and move them around. When they get older, I'll switch to glass but for now - plastic all the way!

Where did the Uh-Oh box come from? 

Pinterst! Here is the source where you can find details about it, a list of potential Uh-Oh chores and the cute graphic to print for your own Uh-Oh box. The Uh-Oh Box Graphic.

I hope that this has sparked an idea! The chore flowers are still going strong in our house since February so... a good four months! We're getting ready to revamp our chore flowers to add more chores and get rid of chores that don't apply anymore. Wishing you the best. Love this?Share it, comment or ask questions below!